 |
Page 2 of all the Hong Kong Photos (Click
for Page 1)
To see enlarged photos place mouse arrow
over any photo then when it changes to a hand press the left mouse button.
Page 2 of all the Hong Kong Photos (Click
for Page 1) |
| A | B | C | D | |
|
1
|
 |
 |
 |
 |
|
2
|
 |
 |
 |
 |
|
3
|
 |
 |
 |
 |
|
4
|
 |
 |
 |
 |
|
5
|
 |
 |
 |
 |
|
6
|
 |
 |
 |
 |
|
7
|
 |
 |
 |
 |
|
8
|
 |
 |
 |
 |
|
9
|
 |
 |
 |
 |
|
10
|
 |
 |
 |
 |
|
11
|
 |
 |
 |
 |
|
12
|
 |
 |
 |
 |
|
13
|
 |
 |
 |
 |
|
14
|
 |
 |
 |
 |
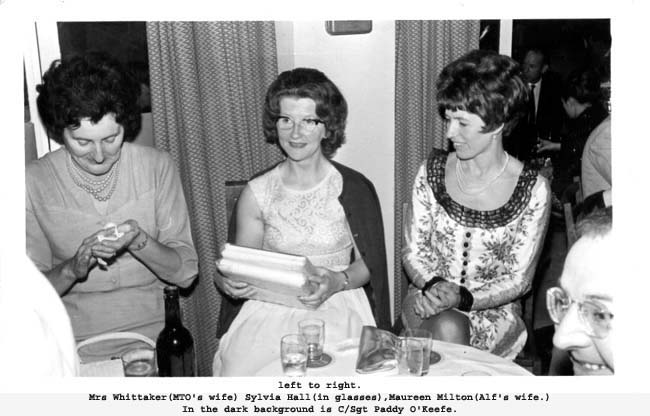
| 15 |  |
 |
 |
 |
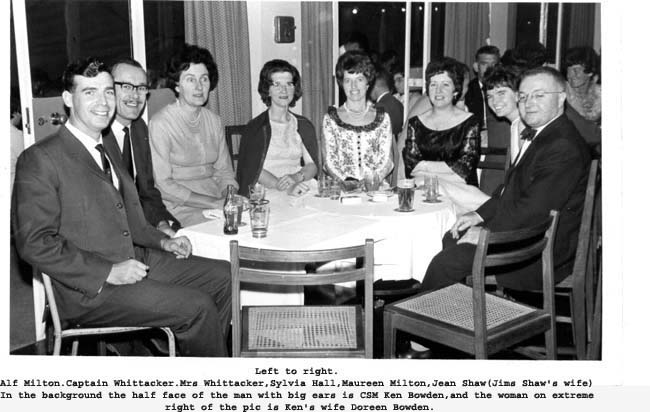
| 16 |  |
 |
 |
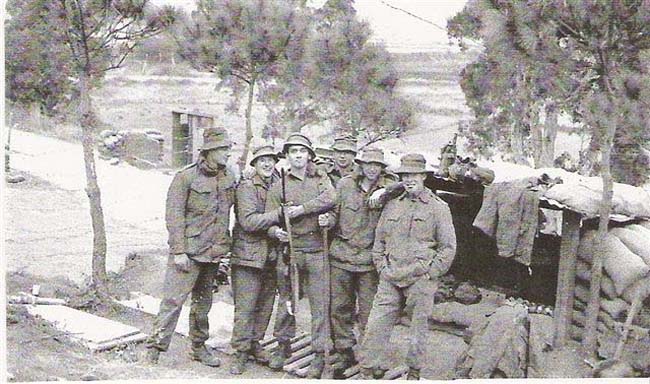
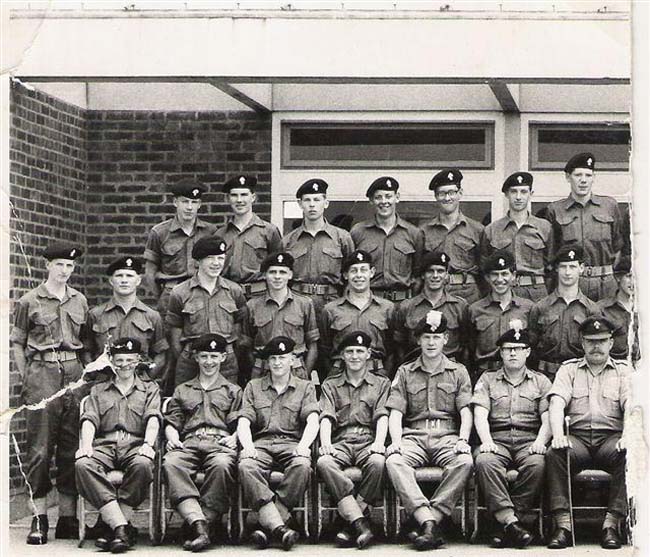
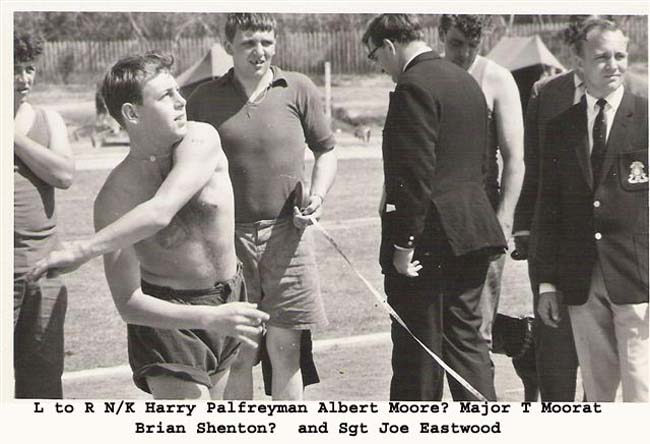
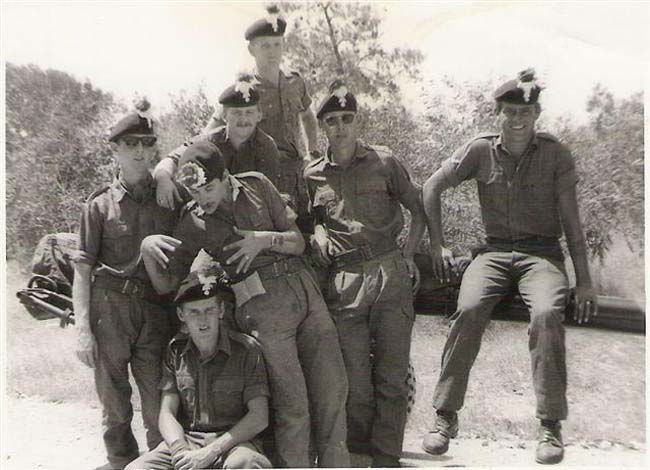
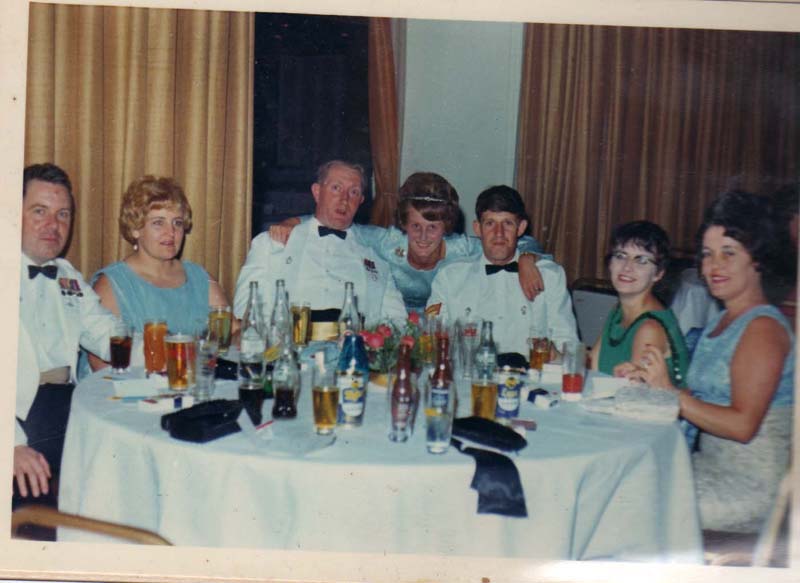
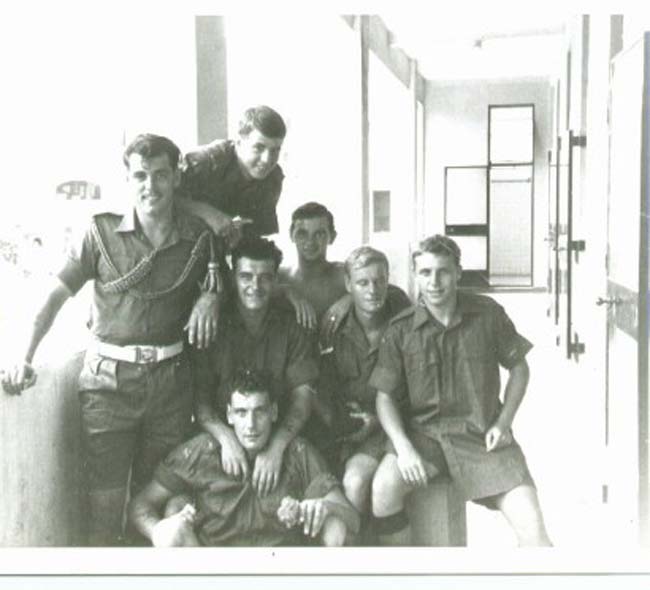
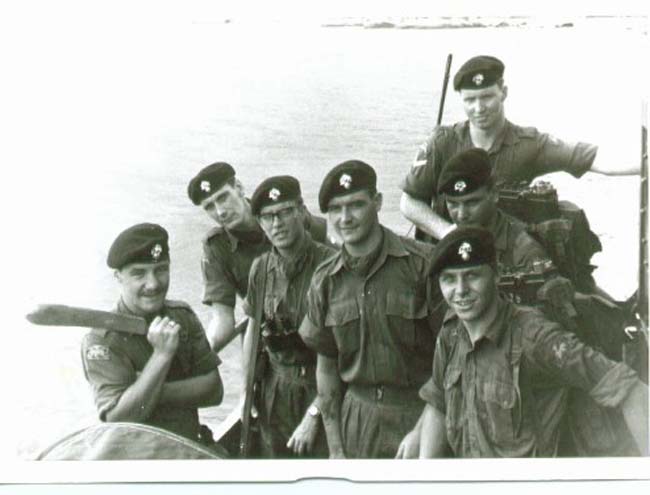
 Ken Rivett, Ken Boden,Jack Horrocks,Brian Oldham and Joe Eastwood Malaya at Jahore Buru |
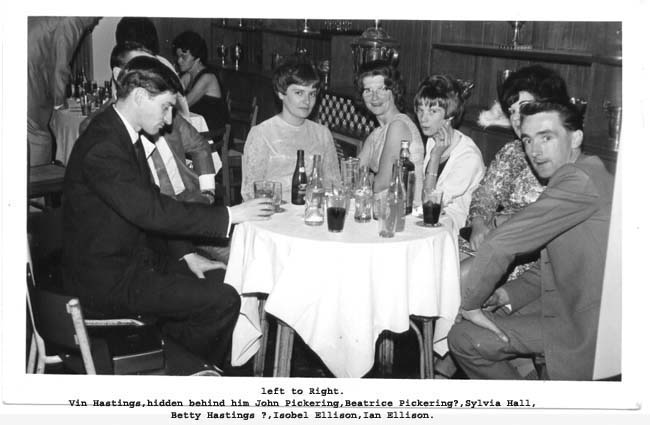
| 17 |  |
 |
 |
 |
| 18 |  |
 |
 |
 |
| 19 |  |
 |
 |
 |
| 20 |  |
 |
 |
 |
| 21 |  |
 |
 |
 |
| 22 |  |
 |
 |
 |
| 23 |  |
 |
 |
 |
| 24 |  |
 |
 |
 |
| 25 |  |
 |
 |
 |
| 26 |  |
 |
 |
 |
| 27 |  |
 |
 |
 |
| 28 |  |
 |
 |
 |
| 29 |  |
 |
 |
 |
|
30
|
 |
 |
 |
 |
| 31 |  |
 |
 |
 |
| 32 |  |
 |
 |
 |
| 33 |  |
 |
 |
 |
| 34 |  |
 |
 |
 |
| 35 |  |
 |
 |
 |
| 36 |  |
 |
 |
 |
| 37 |  |
 |
 |
 |
| 38 |  |
 |
 |
 |
| 39 |  |
 |
 |
 |
| 40 |  |
 |
 |
 |
| 41 |  |
 |
 |
 |
| 42 |  |
 |
 |
 |
| 43 |  |
 |
 |
 |
| 44 |  |
 |
 |
 |
| 45 |  |
 |
 |
 |
| 46 |  |
 |
 |
 |
| 47 |  |
 |
 |
 |
| 48 |  |
 |
 |
 |
| 49 |  |
 |
 |
 |
| 50 |  |
 |
 |
 |
| 51 |  |
 |
 |
 |
| 52 |  |
 |
 |
 |
| 53 |  |
 |
 |
 |
| 54 |  |
 |
 |
 |
| 55 |  |
 |
 |
 |
| 56 |  |
 |
 |
 |
| 57 |  |
 |
 |
 |
| 58 |  |
 |
 |
 |
| 59 |  |
 |
 |
 |
| 60 |  |
 |
 |
 |
| 61 |  |
 |
 |
 |
| 62 |  |
 |
 |
 |
| 63 |  |
 |
 |
 |
| 64 |  |
 |
 |
 |
| 65 |  |
 |
 |
 |
| 66 |  |
 |
 |
 |
| 67 |  |
 |
 |
 |
| 68 |  |
 |
 |
 |
| 69 |  |
 |
 |
 |
| 70 |  |
 |
 |
 |
| 71 |  |
 |
 |
 |
| 72 |  |
 |
 |
 |
| 73 |  |
 |
 |
 |
| 74 | 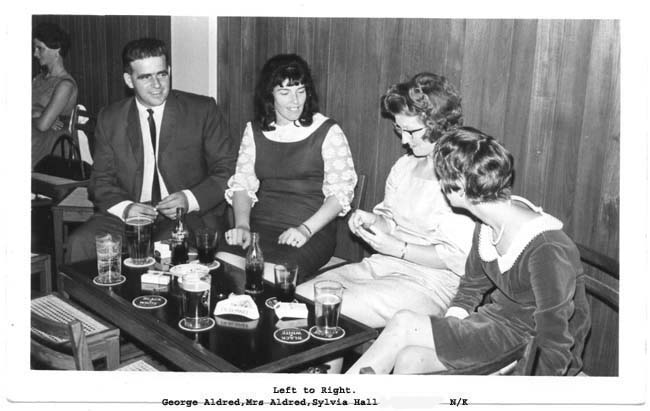 |
 |
 |
 |
| 75 |  |
 |
 |
 |
| 76 |  |
 |
 |
|
| 80 | Click here to see Tommy Hussey's photo collection |  |
 |
 |
| 81 |  |
 |
 |
 |
| 82 |  |
 |
 |
 |
| 83 |  |
 |
 |
 |
| 84 |  |
 |
 |
 |
| 85 |  |
 |
 |
 |
| 86 |  |
 |
 |
 |
| 87 |  |
 |
 |
 |
| 88 |  |
 |
 |
 |
| 89 |  |
 |
 |
 |
| 90 |  |
 |
 |
 |
| 91 |  |
 |
 |
 |
| 92 |  |
 |
 |
 |
| 93 |  |
 |
 |
 |
| 94 |  |
 |
 |
 |
| 95 |  |
 |
 |
 |
| 96 |  |
 |
 |
 |
| 97 |  |
 |
 |
 |
| 98 |  |
 |
 |
 |
| 99 |  |
 |
 |
 |
| 100 |  |
 |
 |
 |
| 101 |  |
 Graham Lanyon and Brian Rowland |
 |
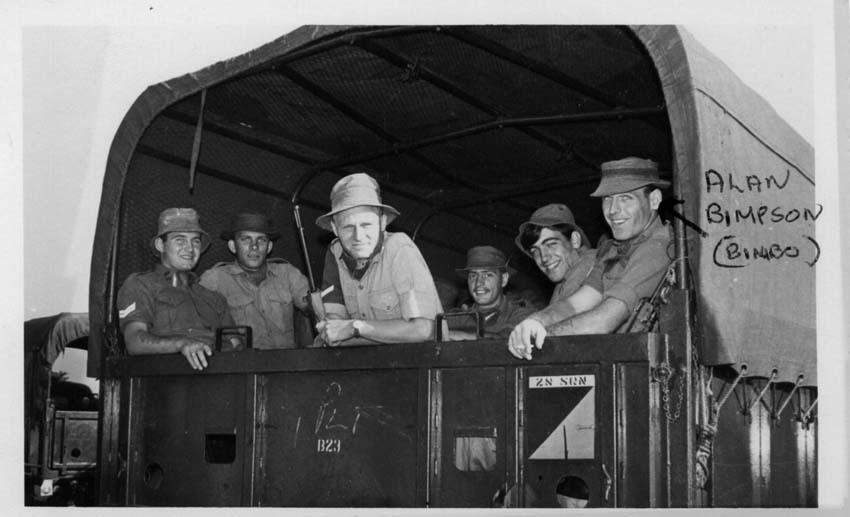 |
| 102 |  Click on this photo to see Alan Bimpsons Slide Show |
The next line of photos
have been sent in by Kevin Bradley |
 |
|
| 103 | 
|
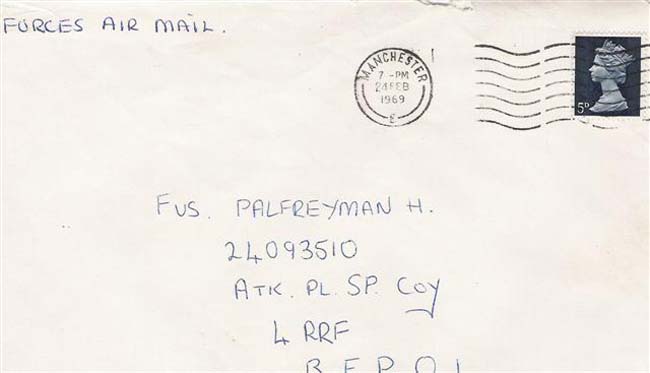
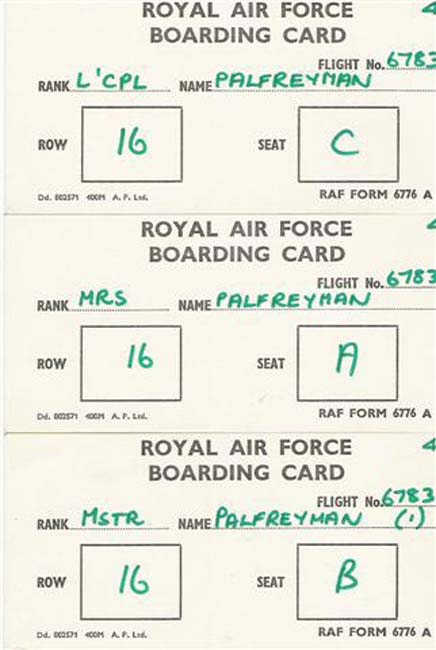
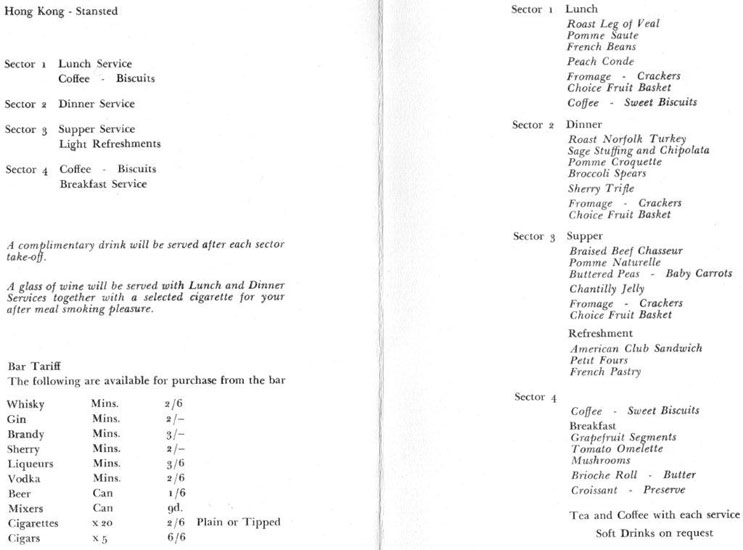
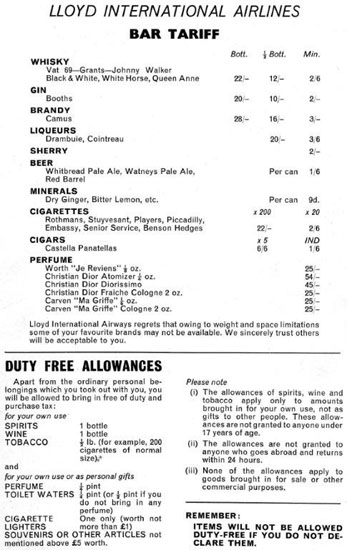
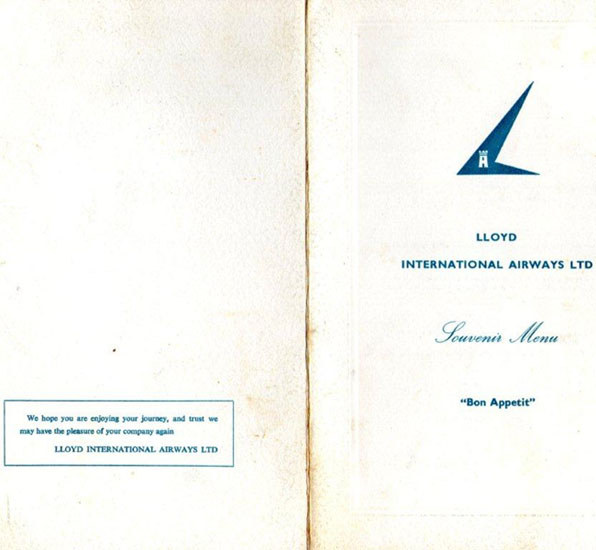 Griff has sent this flight information of the return from Hong Kong see next two photos |
 |
 |
| 104 |
|
|
 James Wood |