
|
CSM Scarratt, Japanese War diary entries
and memories of the LF |
 |
Jennifer Willbourn
has sent us
copies of documents she found at her father's house. They make fascinating reading! |
 |
|
Good Evening Captain Eastwood,
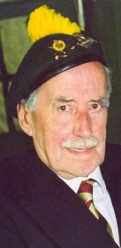
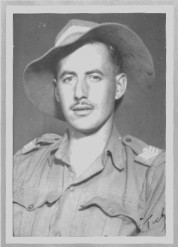
Thank you for replying to my message. I thought you may be interested in the attachments herewith. I found some old documents in a suitcase at my father's house recently. I have typed them exactly as they were written. They were mostly typed, but one page was hand written in pencil in fathers' hand-writing although he does not remember writing it. My father has vivid memories of the Battle of Kohima as he was one of the soldiers involved in the battle across the tennis courts. He has always maintained that the LFs did not get the recognition they deserved in view of the intensity of the battle and the many feats of heroism performed. His last 2 friends from those days passed away this year. One of them was John Done (who has written many poems about Kohima, one of which was read at the York Reunion this year. John McCann visited him on several occasions and recorded many of his stories which were later published in his book although no acknowledgement was made to my father. If you wish to write to father direct, his address is FRIENDS HALL COTTAGE, HADDON LANE, NESS, NESTON, WIRRAL, CHESHIRE, L65 8TA. I regret that my fathers photo album of Burma which I well remember as a child, was lent to someone and subsequently lost by them. I only have a couple of studio photos of him from that period. I trust you find this of interest |
|
Document No. 1 4 (a) Among the masses of documents in the Basha area at MILE 87, the HQ of 31 Div Inf Gp, during the advance down the IMPHAL road, there was known to be much material of great interest and importance. Translations of these documents are gradually coming through and the latest one received is the translation of a "very secret" notebook belonging to Major Yamaguchi, an officer on the staff of 31 Div inf Gp, containing details of the operations around KOHIMA between 4th April and 15th May, ie. From the break through to Kohima up to the withdrawal to ARADURA (b) The document begins with a review of the situation prior to the KOHIMA operations proper. It shows that the main task of 58 Regt Group the "Left thrust force" of 31 Division under command of Major general MIYAZAKI, commander of 31 Div Inf Gp was to capture MAO SONGSANG. Following the defeat of our forces in the SANGSHAK area the regt has carried out a very rapid advance from UKHRUL to eh TUPHEMA area, where it arrived on 1st april. Considerable opposition had been expected at MAO, but when a local report was received on the evening of 1st April that our forces had evacuated MOA, it was immediately decided to exploit to VISWEMA. On 2nd April the Regt received orders from Division to make an independent attack on KOHIMA. (c) The writer then proceeds to a discussion of factors affecting operations. He mentions that in the early stages the attitude of the local inhabitants was favourable, because it was strictly laid down that no troops except administrative personnel specially detailed were to enter villages. Purchase of food was easy. In the course of the KOHIMA operation, however, purchase of food became more and more difficult as the villages were abandoned owing to our artillery fire. (d) In a review of own and enemy strength organisation, tactics etc. the writer gives the organisation of 58 Regt for the operations. (i) Right Attack Force 3 Bn 58 Regt (ii)Left Attack Force (iii) Raiding Party
(i) The enemy was quick to exploit the situation produced by our own evacuation of MAO. His plan was as follows: Right attack force to advance MAO - KIGIMA- KHEZOMA-CHAKHABAMA to engage own troops in the CHEDEMA area, then pursue them northwards to the NERHEMA area. Left Attack Force "after eliminating from area SOUTH of KOHIMA, to the advance towards PRIPHEMA". The raiding party was to advance WEST from MARAM and "cut the enemy line of retreat from KOHIMA" (NOTE: this was the force which we located in the PULOMI area and which, it was anticipated, might be directed onto railway line SOUTH of the MANIPUR road. (ii) The plan went unexpectedly well to start with. No resistance was encountered by Left Attack Force until MILE 50 and by 5th April the enemy was in occupation of ARADURA Hill and exploiting towards KOHIMA. Right Attack Force on the same day reported no enemy on the CHEDEM Ridge and by dusk Pt 5120 in the NAGA Village had been occupied. General MIYAZAKI, thinking that KOHIMA was completely captured, ordered the Right Attack force to break into the town and "pursue enemy to pre-arranged line". Commander 2 Bn 58 Regt was ordered to block the road WEST of KOHIMA with as many men as possible also to attack "in order to force as many men as possible to remain in the font line". (iii) The Left Attack Force, however, had struck the main strength of our opposition on the KOHIMA Ridge, JAIL HILL was occupied on 6th April after a costly attack which cost half a company including Company Commander and all PLATOON commanders, but out Garrison was still firmly entrenched. Reviewing Japanese mistakes in the operations, the writer's notes that the first major mistake occurred at this point. He says " the enemy was underestimated" It was estimated that if the enemy in KOHIMA area abandoned the line CHEDEMA -PFUCHAMA -
ARADURA Hill, he would have to carry out withdrawal. Accordingly it was judged that when right Attack Force broke into the city, complete occupation would immediately follow, and that when LONG HOUSE HILL (JAIL HILL) was captured this would shortly be followed by the capture of the high ground to the NORTH. Because of this, pursuit northwards was ordered too soon…" In other words the enemy failed to achieve concentration of force against our garrison and lost the advantage of surprise, which his rapid advance from MAO had won him. (iv) Both Left and Right Attack Forces now engaged in a series of attacks to capture the positions on the KOHIMA Ridge, and though they steadily reduced the perimeter held by our Garrison, they suffered very heavy casualties from the "Hornet's nest" of which the Garrison defences had now become. On 7th April the enemy suffered a considerable disaster when a large ammunition dump in the vicinity of which Regtl H. and HQ 2 Bn were located, was exploded by our artillery fire Because of the failure to capture the Ridge the raiding force at PULOMA received orders to proceed KHONOMA - JOTSOMA - KOHIMA (we successfully shelled and straffed this force in the KHONOMA area on April 17th when it moved into the JOTSOMA area and occupied positions to the SOUTH) (v) An enemy attempt to blow the bridge across the DZUNA NALA at mile
39½ on 19th April was unsuccessful at the charge failed to explode.
(xi)
Document No. 2 SECRET 4 Inf Bde arrived at DIMAPUR and JERHAT Aerodromes between the 10th and 15th April. By the 16th June the Bde had concentrated in the area of the 32nd Mile Stone and Priphema. Its tasks were to hold the area 32 Mile Stone Khabvuma (a village about one and a half miles north of 32 Mile Stone) Priphema to keep the road open between Zubza and Priphema and Khabvuma. At this time 5 Inf Bde was operating about MS38 to 40 to open the rd to Jhotsaoma and Kohima. About 1 regiment of Japanese was concentrated on the Merema Ridge with the probable object of cutting the rd at Priphema and advance elements of this force had been encountered in the Dzuma Valley and near Khabvuma. In this area 2 Norfolk and 18LF carried out extensive patrolling but little contact was made with the enemy. On the18th April patrols of the 1 R.S. discovered a force of about 60 - 100 Japanese dug in about 500 yards east of Khabvuma on a spur leading down to the Dzuma Valley. The position was extremely strong and an attack by One Coy of 1 R.S. supported by 16 F.D Regt. RA failed to dislodge the enemy. A further attack was made by 1 R.S. on the 20th and this also failed. The artillery and air bombardments proved so costly to the enemy that he withdrew on the night of the 23rd/24th April leaving behind about 30-40 dead and considerable arms, equipment and documents. On the 24th April after 6 Inf. Bde. had relieved the Kohima Garrison. Operation "STRIDENT" was planned. 4 Inf. Bde. consisting of 1 R.S, 2 Norfolk, 143 SS Coy. Sec. of 5 Fd. Coy. and a P1 of "A" Coy. 2 Manch. with HQ 99Fd. Regt. was to advance round the enemy's flank via Kohima to the ridge SOUTH of PULEBADZE and establish a strong position behind the enemy on the ARADURA SPUR. 18 L.F. was not available for the operation having been placed under comd. of 5 Inf Bde. for the operation to cross the DZUMA Valley to the MEREMA Ridge, 200 to 300 Naga Coolies were made available for 4 Inf Bde. to lift rations, ammunition and food. The route of the encirclement was over country far too difficult for mule transport. The march began at the 40 Mile Stone at dusk on 25th April. At this stage the Bde was ordered by 2 Div. that its' objective was
GPT RIDGE, known to be held by the enemy, instead of ARADURA which was
thought not to be occupied by the Japanese. 2 The attack on GPT Ridge was carried out on 4th May. Briefly the plan was for 2 Norfolk to capture the highest point of GPT Ridge below the edge of the jungle with 143 SS Coy. protecting their RIGHT Flank.. On the capture of GPT Ridge 1 RS were to pas through 2 Norfolk and capture the Pimple at the end of the GPT Ridge by the rd opposite JAIL HILL. The battle for GPT Ridge was essentially a 2 Norfolk victory. A Jap Coy. position was discovered astride the track leading to 2 Norfolk Start Line just short of the jungle edge. This position was bypassed in the thick jungle and 2 Norfolk fought their way round on GPT Ridge where they rushed the Jap defences off their feet and took their objective by mid afternoon. They were then faced with more determined and far better organised resistance on the more open NORTH EASTERN end of GPT Ridge. By now it was too late for 1 RS to mount an attack on the positions beyond 2 Norfolk objective and the Bde. established defended localities on 2 Norfolk objective and in the jungle 400 yards SOUTH WEST. The enemy position between the Bde and PULEBADZ, which had been by-passed, still remained, and the Japs in the ARADURA Valley and NORTH EAST at the end of the ridge were well dug in and full of fight. The ammunition state did not cause worry as 1 RS had not yet been heavily
engaged but 2 Norfolk would soon require replenishing. Rations and water,
however, were short and half rations were all that was available for several
days and water was restricted to one bottle per man per day. On the 5th
May 33 Ind Inf Bde established a mile route to the Bde. which was cut
by a Jap counter-attack on 7th May. The same day, Brigadier GOSCHEN was
killed at 2 Norfolk position while reconnoitring for a fresh attack of
the NORTH EASTERN end of GPT Ridge. The opening of a supply route was
made a priority task for the Division and was soon opened by 33 Bde. The operation to secure GPT Ridge was now completed; the Bde. held the feature and patrolled forward across the ARADURA Valley. The next operation in which the Bde. took part was an attack on ARADURA feature by 1 R.S. and 2 Norfolks. The Jap position was skilfully chosen and the assault had to be made up an extremely steep slope. 2 Norfolk on the right encountered heavy LMG fire and showers of grenades just below the crest and those few men who reached the crest came under fire from positions in depth on the reverse slopes which could not be eliminated by artillery fire and could not be approached by tanks. 1 R.S. on the left succeeded in taking their first objective but were unable to hold it on account of fire from the same reverse slope positions which 2 Norfol;k could not reach, and also were shelled on their first objective by a 75mm gun at close range. Further gallant attempts were made during the afternoon to take the position, but these also met with failure for the same reasons and the 2 Bns. were ordered to withdraw. /3………………….
On the 5th of June the enemy withdrew from ARADURA and on the 6th of
June 4 Bde. lead the advance of 2 Div. down the IMPHAL road and by the
evening of the 7th had encountered enemy at KIGWEMA village after mopping
up isolated parties of Japs around KIGWEMA Hospital during the day. On
the 8th June 1 R.S. advanced to MS 56.5 after clearing the Jap positions
at KIGWEMA. The operation to clear the VISWEMA spur now became a Divisional task and 4 LF held the ground thus far gained and assisted 5 Bde. who cleared the NORTH end of VISWEMA village and the spur which was the main core of the enemy resistance. When the VISWEMA position was cleared on the 14th June 6 Bde. continued the advance down the road and 4 Bde was with drawn to rest and refit. The Bde. joined battle again on the 19th passing through 5 Bde.at MARAM when 1 R.S. captured the high ground EAST of MS 82 on the 20th June. Considerable numbers of enemy were left in the MARAM area to be mopped up by 5 Bde. and the advance continued unhindered as far as 88th MS where a road block was encountered. Here the enemy attempted to blow a prelaid charge under the loading armoured car and failed to do so. The Bde. remained concentrated for the night in the area of the 87th Milestone where the enemy had been surprised by the swift advance and had left large quantities of documents, personal kit and food still cooking on the fire. The enemy appeared to be holding the high ground at Pt 4808 with a gun firing on the road at MS 88. So far the enemies action tended to confirm his plan shown in marked map captured at MS 82. Later, it was discovered that his position at MS 88 was only lightly held and that his defences at MARAM had fallen too quickly for him to occupy his chosen position before we reached them On the 22nd the Japs had withdrawn from MS 88 and the advance continued
without opposition as far as MS 103.. The only Japs seen were stragglers
who were swiftly disposed of The Bde then held the ground gained and the
advance was continued by 6 Bde. |